 Save
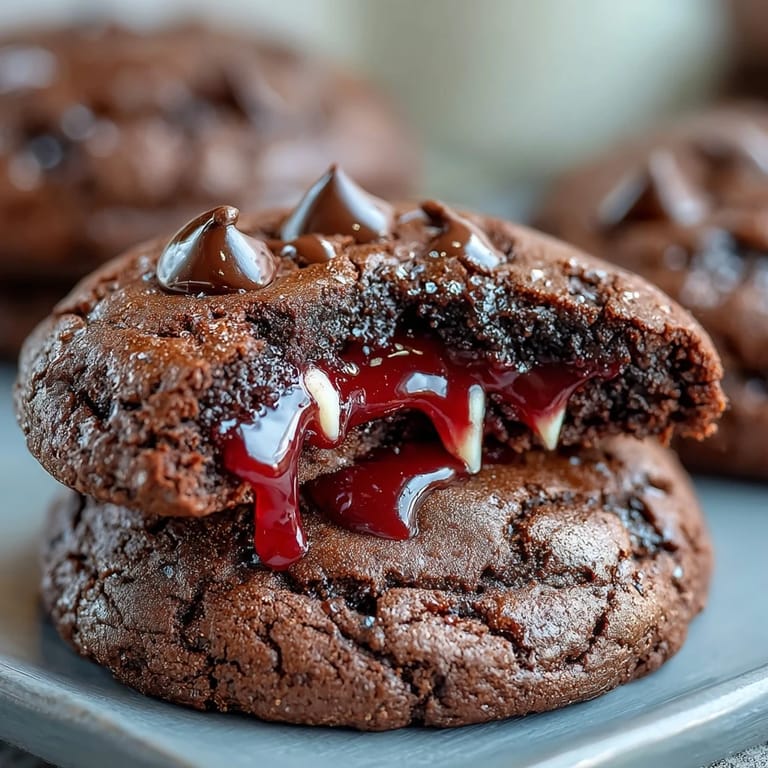
Save My sister showed up at my door last October with a box of candy fangs and a mischievous grin, demanding I make something Halloween-worthy that would actually taste good. I'd spent years rolling my eyes at gimmicky holiday recipes, but something about those tiny plastic teeth made me want to prove that fun and flavor didn't have to be strangers. These chocolate vampire cookies became our tradition that night, and honestly, I've never looked back.
I made a batch for my daughter's school bake sale, and watching kids' faces light up when they realized the fangs were edible was worth every minute of piping red icing at midnight. One kid came back three days later asking if I'd teach his mom how to make them, and that's when I knew these weren't just cookies.
Ingredients
- All-purpose flour (2 cups): This is your foundation, and measuring by weight if you have a scale makes a real difference in consistency.
- Unsweetened cocoa powder (¾ cup): Don't skimp on quality here because it's the soul of the cookie, and cheap cocoa tastes thin and bitter.
- Baking soda (1 tsp): This is what gives you that slight spread and chewy texture, so measure it level and don't guess.
- Salt (½ tsp): A pinch that everyone forgets but that makes the chocolate taste deeper and richer.
- Unsalted butter (1 cup), softened: Room temperature is non-negotiable here because cold butter won't cream properly and you'll end up with dense cookies.
- Granulated sugar (1 cup) and light brown sugar (½ cup): The combination of both gives you structure and moisture, so don't try to use just one.
- Eggs (2 large): Bring them to room temperature too because they'll incorporate better and make the dough smoother.
- Pure vanilla extract (2 tsp): The real stuff matters more than you'd think, and imitation will leave a slightly off aftertaste.
- Semisweet chocolate chips (1 cup): These fold in last and melt slightly into the warm dough, creating those pockets of gooey chocolate.
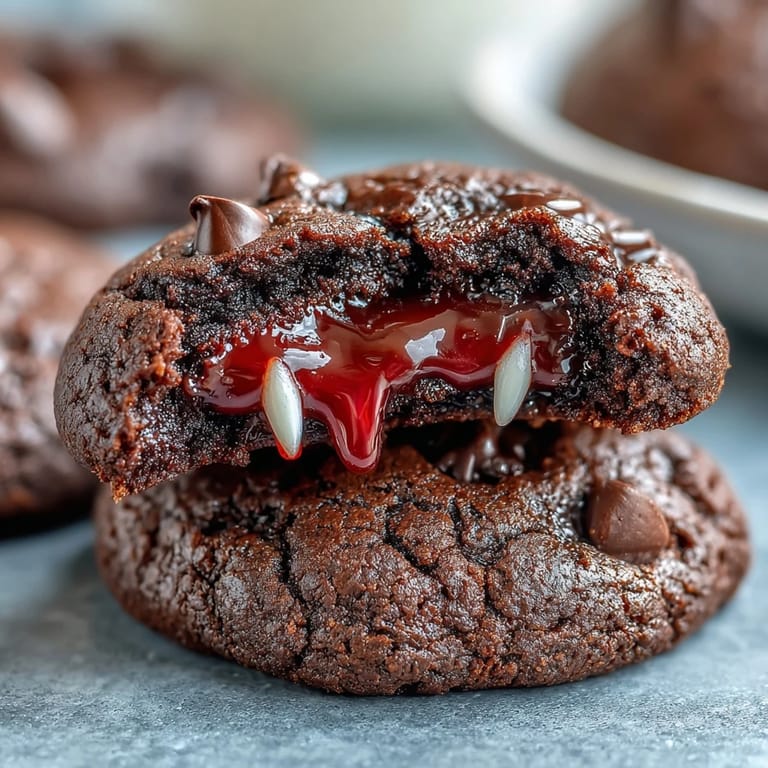
- Candy fangs or white jelly beans (48 pieces): Press these in while the cookies are still warm so they stick without sliding around.
- Red gel icing (¼ cup): Gel holds its shape better than regular icing and actually looks like something vampiric.
Tired of Takeout? 🥡
Get 10 meals you can make faster than delivery arrives. Seriously.
One email. No spam. Unsubscribe anytime.
Instructions
- Get Your Station Ready:
- Preheat your oven to 350°F and line two baking sheets with parchment paper so you're not scrambling when the dough is ready. This takes two minutes and saves you from burnt cookie edges.
- Mix Your Dry Ingredients:
- In a medium bowl, whisk together the flour, cocoa powder, baking soda, and salt until there are no lumps in the cocoa. This step aerates everything and ensures even distribution of leavening.
- Cream the Butter and Sugars:
- Beat the softened butter with both sugars for about 2 to 3 minutes until the mixture looks light, fluffy, and slightly pale. You'll know it's ready when it looks almost mousse-like and drops from the beater in soft ribbons.
- Add the Eggs and Vanilla:
- Crack in one egg, beat it until fully incorporated, then add the second egg the same way. Finish with the vanilla extract and mix until everything is smooth and cohesive.
- Combine Wet and Dry:
- Gradually add the dry mixture to the wet mixture, stirring gently with a spatula or on low speed until just barely combined. Stop as soon as you don't see streaks of flour because overmixing toughens the cookies.
- Fold in the Chocolate:
- Add the chocolate chips last and fold them in by hand so you don't overwork the dough. They'll distribute more evenly this way and some will melt slightly into the warm dough.
- Scoop and Space:
- Use a tablespoon or small cookie scoop to portion dough onto your prepared sheets, leaving 2 inches between each one because these spread slightly. The cookies should look like little chocolate mounds, not perfectly smooth.
- Bake Until Perfect:
- Bake for 9 to 11 minutes, checking around the 9-minute mark because ovens vary wildly. The edges should look set and slightly firm while the centers still jiggle slightly when you gently shake the pan.
- Cool and Transform:
- Let the cookies sit on the baking sheet for about 5 minutes so they firm up enough to move without falling apart, then transfer to a cooling rack. While they're still slightly warm, press two candy fangs gently into the top of each cookie and let them set as the cookie cools.
- Add the Dramatic Finish:
- Once the cookies are cool, pipe red gel icing around the fangs to look like blood dripping down. Let it set for a few minutes before serving so the icing doesn't smudge.
 Save
Save The first year I made these, my coworker brought one to the break room and didn't say a word about it, just left it on the counter. Three people asked where it came from, and by the end of the day I had requests for the whole batch. That's when I realized these aren't just cookies with plastic teeth in them, they're actually conversations starters.
Why These Cookies Stay Soft
The secret is in the ratio of brown sugar to granulated sugar and knowing exactly when to pull them out of the oven. Brown sugar holds moisture because of the molasses in it, so those cookies stay chewy for days even after cooling completely. I learned this the hard way by making batches that came out cake-like and dense, and now I understand that underbaking by a minute or two is actually the goal here.
Making These Kid-Friendly or Spookier
If you're making these for little kids who get squeamish about the vampire theme, just skip the red icing and they're just fancy chocolate cookies with edible decorations. On the flip side, if you want to lean into the spooky side, you can dust them with black cocoa powder before adding the fangs, or swap the red icing for black gel and make them look genuinely sinister. I've also added a tiny pinch of cinnamon or espresso powder to the dough when I want them to taste a bit more sophisticated and less like pure sugar.
Storage and Make-Ahead Tips
These cookies live happily in an airtight container for up to four days, and the icing actually sets harder the longer they sit so they're easier to handle.
- You can make the dough the night before and bake them fresh in the morning, which means you get that warm cookie experience without the time crunch.
- If the candy fangs fall out during storage, just press them back in or use them as an excuse to eat a cookie guilt-free.
- These freeze beautifully after baking, so make a double batch and save half for a surprise treat or unexpected party.
 Save
Save These cookies became my October tradition because they remind me that food can be playful and take itself seriously at the same time. Make them for people you like, watch their faces when they realize the fangs are actually delicious, and enjoy the chaos of a kitchen that smells like chocolate and feels a little bit magical.
Recipe FAQ
- → What makes these chocolate treats chewy?
The combination of softened butter and brown sugar creates moisture and tenderness, while baking just until edges set keeps the centers soft and chewy.
- → Can I substitute candy fangs with other decorations?
Yes, white jelly beans or slivered almonds make great alternatives, providing a similar playful effect without altering texture.
- → How do I achieve the best 'blood' effect around the fangs?
Use red gel icing piped carefully around the candy decorations to create a vivid, dramatic contrast that enhances the spooky theme.
- → Are these treats suitable for vegetarians?
Yes, the ingredients used are vegetarian-friendly, but always check candy ingredients for gelatin which may not be vegetarian.
- → What storage method keeps these cookies fresh?
Store in an airtight container at room temperature for up to four days to maintain softness and flavor.